Ami James

My creative journey towards City & Guilds Embroidery Certificate - Level Three

Tuesday, 8 March 2016

Chapter 11 - Growth & Disintegration

First Thoughts - Paper Experiments

On samples 11.1 through to 11.4 I experimented disintegration using paper. I used different methods such as ripping, tearing, crumbling, hole punching, pin pricks, cutting, scorching, folding, slashing, stabbing, burning and soaking.

All of the methods created a different effect regarding textures and visual differences.

11.1

11.2

11.3

11.4
My favourite sample page out of the four is definitely 11.4 because of the dramatic change in appearance.

Second Thoughts - Paper Shapes

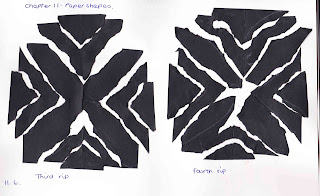
Pages 11.5 through to 11.8 are my samples of ripping a shape up into segments, however after I had finished I had a go at cutting the segments just to see what differences it would make.

11.5

11.6

11.7

11.8

Surprisingly after I preferred the dramatic change on the previous samples I have to say I do prefer the cut and neater version in this experiment.

My next sample page I have used techniques from this chapter to make more disintegrated paper shapes. I have used negative and positive shapes on this page.

11.9
I like all of these samples.

Third Thoughts - Fabric Shapes

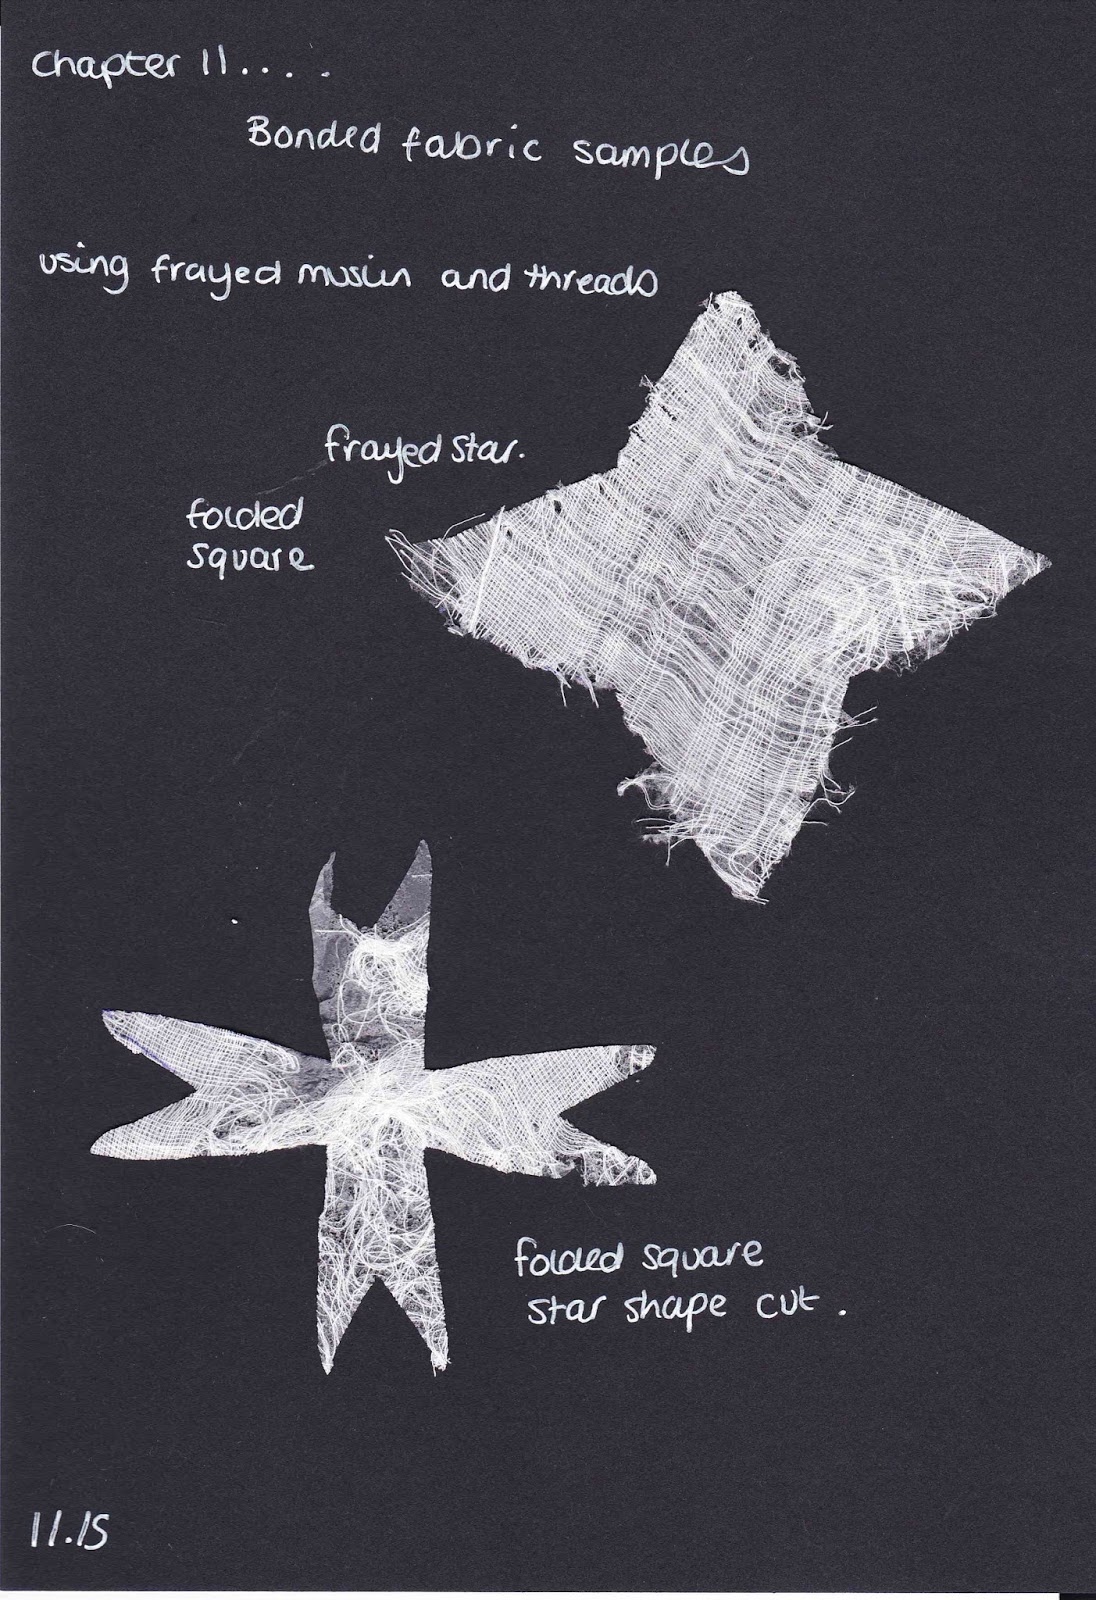
Sample pages 11.10 through to 11.15 - Such interesting effects. I experimented with positive and negative shapes using muslim. Taking time to fray……which is very therapeutic.

11.10

11.11

11.12


11.13

11.14

11.15

Again I like all of the samples however my favourite has to be the last page ( bonded fabric ). I love the visual effects of these two samples. 

Fourth Thoughts - Stitched Shapes 

Pages 11.16 through to 11.22.
This was so much fun. I started with hand stitching the first samples that you can see and try again afterwards using machine stitching. 

11.16

11.17

11.18

11.19

I preferred the hand stitched samples using seed stitch. The machine stitched samples are still effective though. Instead of free machining I picked a decorative stitch. 

Additional Samples

Pages 11.20 through to 11.22 - I used different techniques using the methods I have learnt through this module. Slashing, reverse appliqué using a soldering iron and bonded fabrics.

11.20

11.21

11.22
This chapter has been amazing, so many techniques and experiments to sink my teeth into. I've learnt so much. I probably have spent way too long on this chapter but I felt I needed to take my time.

Time spent - 42 Hours.

Cost Occurred - Black card - .150 - Muslim - 3.00 

Total Cost - 4.50


Saturday, 27 February 2016

Chapter Ten - Making Ripples - Chenille or Slashed Reverse Applique.


Well what a chapter, I've been engrossed in this for 18 hours and have made a few samples.

Before I start I just want to say that the scans are a bit blurred so I have included photos alongside.

10.1


10.2


Additional Section

Using a Soldering Iron


Firstly a made up a fabric test using kunin felt organza, chiffon, dress net, crepe chiffon and backed by cotton fabric. 

All Fabrics worked well.


Next up ….. trying different ways and shapes to move the soldering iron.


Add caption
Add caption
I finally felt confident using the iron so I moved on to make a sample….
Before photo of stitching
After .

10.3 and Health & Safety


And me looking very cold whilst working on my samples 


Wednesday, 24 February 2016

Chapter Nine - Traditional & Contemporary Methods

Ok I'll admit I'm not pleased with my first sample (traditional method).

I used cotton fabric for all the layers but I just couldn't get to grips with folding the fabric under. It was extremely fiddly.

Traditional Method

9.1 - Traditional Method

However I have loved making the rest of the samples….


Contemporary Method


9.2 - Contemporary Method


These are additional samples of the above methods ….

9.3 - Additional Contemporary Method.

Contour & Ripple Effect


Next up my samples using the ripple and contour effect….

9.4 - Ripple & Contour Effect.

Evaluation

I think the samples I have produced show the a dramatic difference of the huge difference in looks using the same method but reversing the cutting. I'm so excited about this as the list of possibilities is endless. I've enjoyed experimenting with lots of different fabrics and textures to see what works well. My favourite sample is without a doubt the frayed star on page 9.3 both visual and texture.

Time spent - 17.5 hours.


Saturday, 13 February 2016

Chapter Eight - Complex Samples

I Spent a long time trying to figure this chapter out. Hopefully I have took the correct path for the following samples.

I found it easier to design the samples on paper first and picking techniques to use. I have photo evidence of my scribbles.


This helped me tremendously by keeping me focused. I did change a few samples as I went along and when idea's popped into my head.

8.1


I'm pleased how both the these samples turned out. However I must say the bright orange looks red on this scan but I assure you its orange. I love the shapes and the complexity.

8.2


These are my favourite samples out of the six. The top sample is by far the most eye catching (but that is just my opinion). The second sample was not on my original list of designs. I used the negative shape form the previous sample page to create this sample, and I'm glad I did. This is my most interesting sample (in my opinion).

8.3

My final sample page. This is blurred which I assume because of the padding.  The top sample I'm not sure about. I don't know why, maybe its the design shapes. The bottom sample works better, looks full of texture. Because the page is blurred I've taken photos to show the areas of padding. 


This chapter has been very enjoyable and interesting. I'm amazed how one set of shapes can produce so many different looks and even in the same colour combination.

I have probably taken longer than needed for this chapter however planning and sketching idea's really helped.

Time taken - 25 hours.


Sunday, 7 February 2016

Chapter 7 - Translating The Layered Designs Into Embroidery

I have made up 6 samples for this chapter in which all designs came from my previous chapters.

Materials used -
 muslin
satin
felt
dress net
cotton
denim
even weave
organza
wool
Perle threads
machine embroidery thread
tissue paper
tracing paper
decorative thread

My first sample -
In the stitched sample I found things easier by using tracing paper to copy my design. I used denim as the background, cotton for the middle layer that created the border and the satin for the symbol. This sample was hand stitched using a basic back stitch using blue Perle thread and orange yarn.

Sample two & three.

This is one of my favourite designs so I decided to make two samples using different colour combinations.
Shiny, slippery fabric for the backing, felt and dress net for the layers. Hand stitched using parallel stitches and a whipped back stitch. Perle thread, stranded embroidery thread and tapestry yarn were used. I love the different textures in this sample.

Cotton fabric for the backing, cotton and satin for the layers. Hand stitched using whipped stem stitch, fly stitch and back stitch. Perle thread and yarn were used.


Sample four

I took a design from the leftovers I had in a previous chapter.
This sample has four layers of applique. Cotton for the backing, cotton, satin, felt, and a bonded fabric. Machine stitched using decorative border stitches, zig zag, satin stitch and blanket stitch.


Sample five.

This is another design I took from the leftovers I had.

Even weave for the background, cotton and a bonded tissue paper fabric for the layers. Machine stitched using decorative stitches and variegated threads. I don't really like how this sample turned out. It doesn't give the effect of being interlinked very well.

Sample Six


 This is an asymmetric design for a previous chapter.

Denim for the background, dress net and felt used for the layers. Machine stitched using straight stitched, and zig zag to couch over metallic cord.

I spent 22.5 hours on this chapter.

Ive thoroughly enjoyed the stitching samples and I'm finding I'm more confident with colour shades.